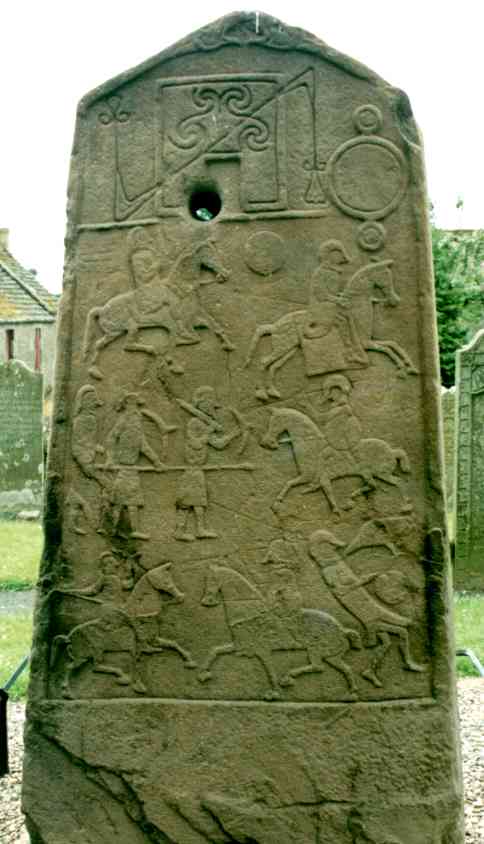
Aberlemno 2 is one of the most beautiful Class II Pictish stones. The hole drilled through it is a later "enhancement". Note that the apparant shape of the stone in the photographs--a wide base and tapering towards the top--is the actual shape of the stone and not the result of a low camera angle nor a wide-angle lens!
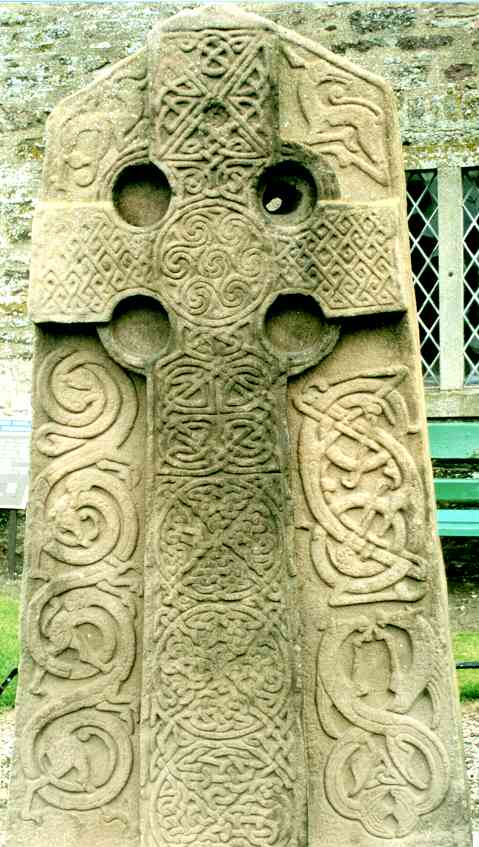
The Cross Side
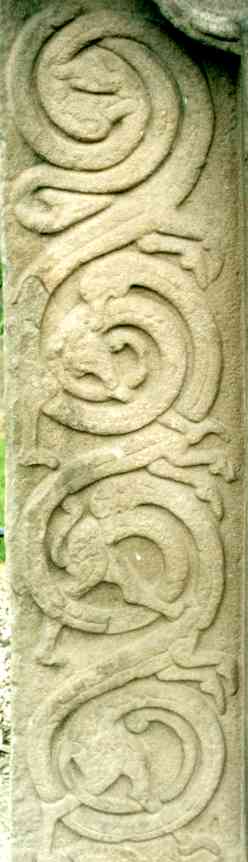
The cross itself is very precisely decorated with complex and neat interlacing at top and (especially) bottom, angular key-patterns on the arms and spiral designs in the centre.
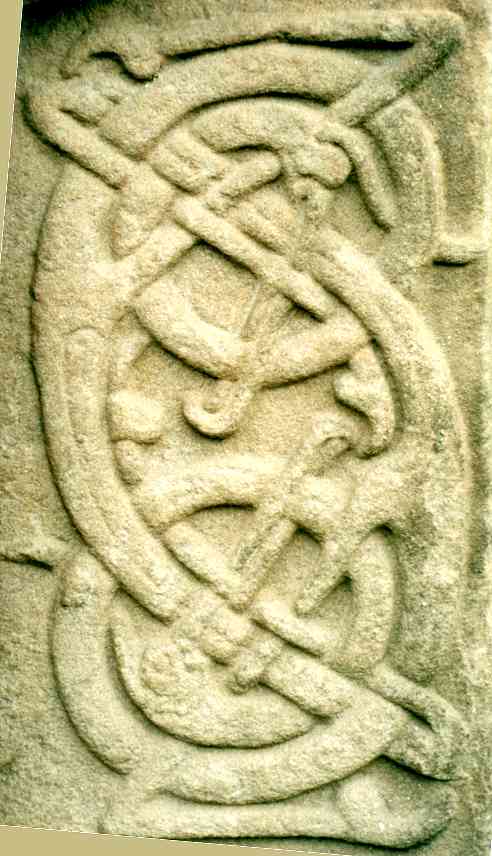
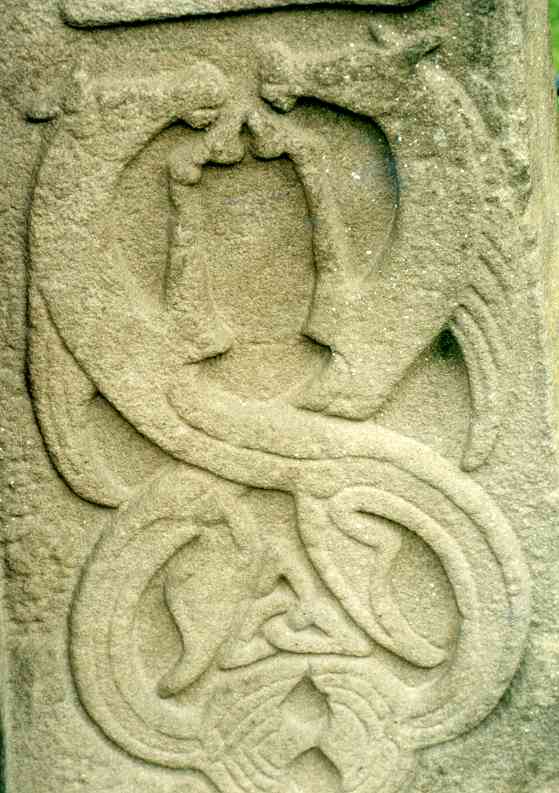
Interlaced animals decorate the slab to either side of the cross and there is a perfectly executed triquetra knot above the tails of the fish-tailed horses to the bottom-right.
Scottish folklore has stories of the kelpie or eich uisge (a water-horse) and tarve uisge (a water bull). It has been suggested that the "Pictish beast", one of the most common symbols on Class I stones, is a representation of this mythical creature. In which case these intertwined creatures would seem to be a more sophisticated sculpture of the Pictish beast.
The Symbol Side
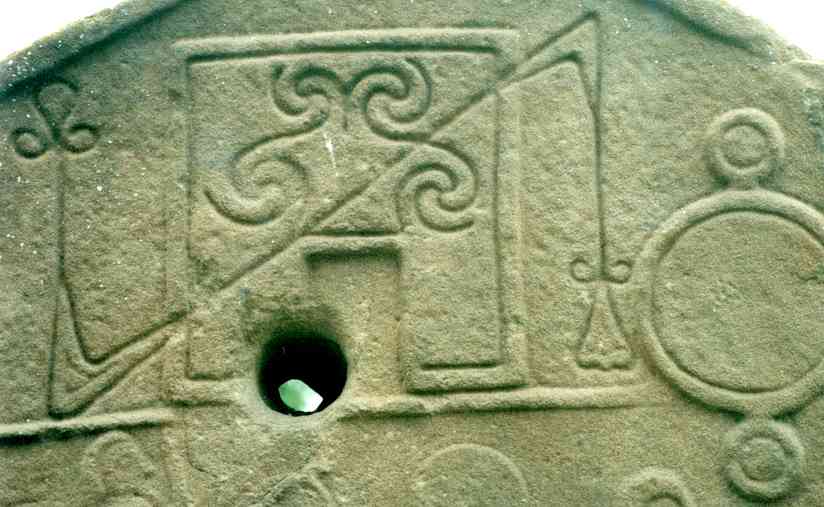
At the top of the reverse of the slab are a notched rectangle-with-Z-rod symbol and a triple disc. Charles Thomas suggests that this translates as To a dead war leader remembered by a member of the magician clan.
Below the symbols are four scenes from a battle--it is widely accepted that this is the Battle of Nechtansmere fought in AD685, which took place less that ten miles from Aberlemno. The Northumbrian King Ecgfrid and his warriors invaded northwards, but were defeated by the Pictish leader Brude mac Bili.
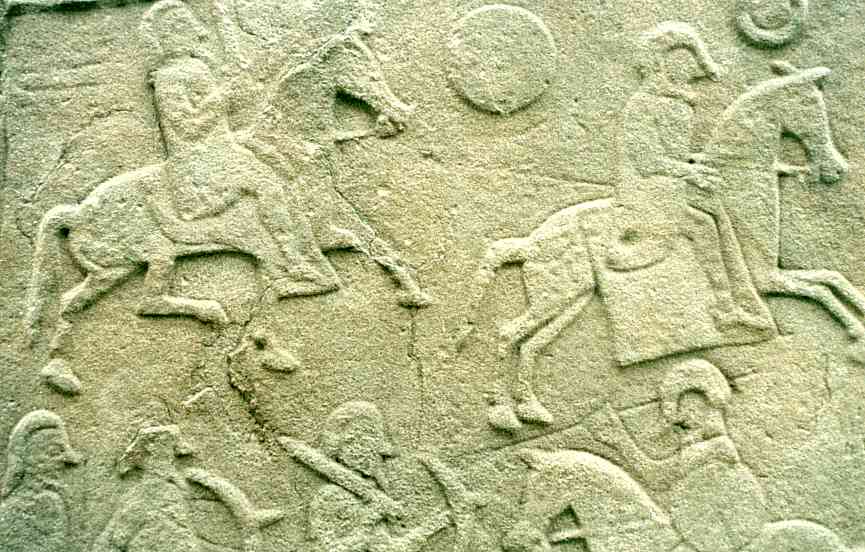
The top scene shows two horsemen: a Pictish swordsman chases his helmeted foe who has thrown away his weapon and shield. (The shield is clearly visible behind the fleeing warrior. His sword can just be made out to the right of the shield--it is vertical with the hand-guard down.) The long nose-guard on the helmet identifies the fleeing warrior (and the other warriors on the right-hand side of the stone) as an Anglian. Similar helmets were found in the Coppergate excavations in York and has been dated to the 8th century. The undocked tail of the fleeing horse and the large saddle blanket suggest a warrior of some importance--possibly King Ecgfrid himself.
The middle scene shows three Pictish foot-soldiers standing against an Anglian horseman, and is suggestive of Pictish battle tactics: the right-most Pict protects himself with his shield and has his sword ready to slash; behind him stands a spearsman uses his lance to protect the swordsman. A second spearsman stands at the ready to the rear.
Bottom-left, an Anglian horseman is at the point of throwing his spear at a Pict who directs his own horse with his knees (the reigns can be seen hanging loose).
Bottom-right, a dead Anglian is prey for the symbolic raven.
See also: Aberlemno I, Aberlemno III and Aberlemno V.